What Are Hops? Species, Origin and Characteristics of Hops
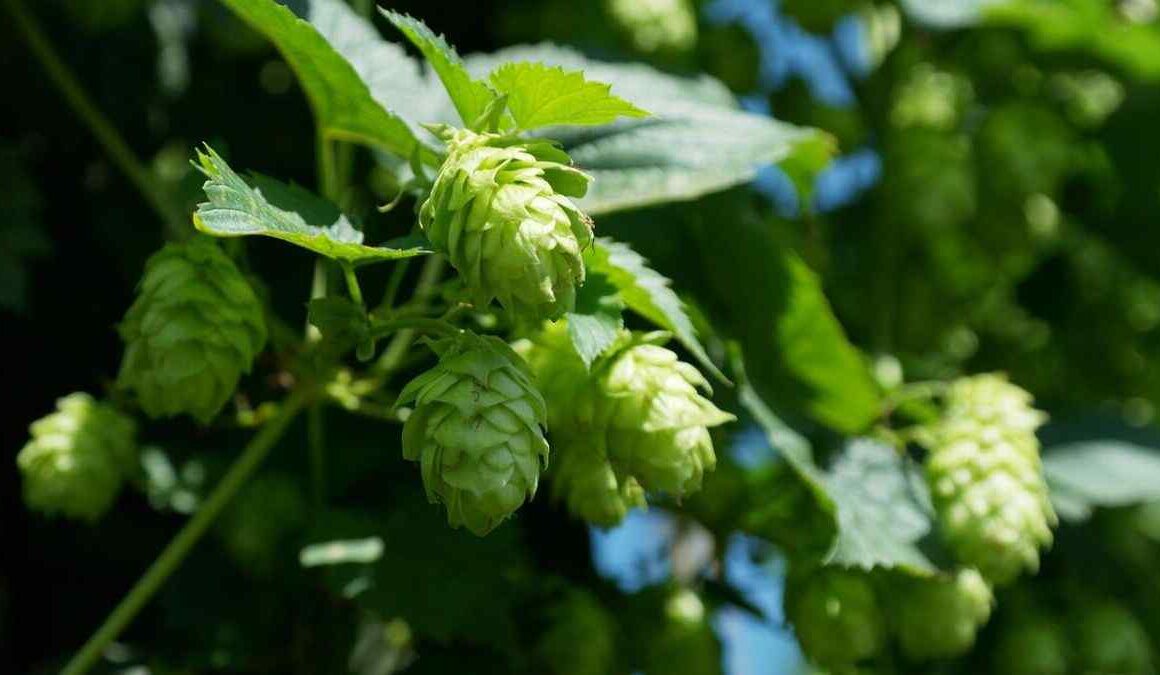
Hops are the female flower clusters of the hop plant, Humulus lupulus. It’s a perennial plant belonging to the hemp family (Cannabaceae), and it’s native to Europe, Western Asia, and North America. It blooms year after year – for the winter, it dies back to a cold-hardy rhizome. So, the quick answer to the question “how to grow hops?” is “by planting hop rhizomes.”
These plants are used primarily in brewing beer, to which they add bitterness and flavor. Hops are climbing plants, and can grow up to 20 feet in a single season. There are dozens of commercial hop varieties, each with its own unique flavor profile. For example, Cascade hops are often used in pale ales for notes of citrus, while Chinook hops are added to achieve a bitter pine flavor.
Hops are a relatively new addition to the brewing process, and were not used until the 15th century. Prior to that, brewers relied on a variety of herbs and spices (such as sweetgale) to add flavor to their beer. Today, hops are an essential ingredient in many popular styles of beer, and their popularity shows no signs of slowing down.
Where to Get a Hop Rhizome?
You can purchase hop rhizomes from a variety of online retailers, or you can get them from your local homebrew shop. If you’re looking for a specific type of hop, make sure to check that the retailer has it in stock before making a purchase. After all, the flavor of your beer depends on the type of hops you use.
When to Plant Hop Rhizomes?
The best time to plant hop rhizomes is in early spring, as soon as the ground can be worked. If you live in an area with a short growing season, you can start them indoors about six weeks before the last frost date.
Don’t worry if another frost threatens to come after planting. You can protect the plant by covering it with a layer of mulch, like straw or plywood. However, if you live in an area with very cold winters, it’s best to wait until mid-spring to plant the rhizome.
How to Grow Hops at Home: Planting the Rhizomes
Now, it’s time to learn how to grow hops. Here’s everything you need to know about planting and caring for your hops.
- Choose a spot in your garden that gets direct sunlight and has good drainage. Hops like to spread out, so make sure you have enough space – about two square feet per plant.
- Dig a hole that’s about 1 foot deep. Amend the soil with manure or fertilizer (such as bone meal or rock phosphate) to help the plants get off to a good start.
- Return the fertilized soil to the hole.
- Plant the rhizomes horizontally, about 1 inch below the surface, or vertically with the buds pointing up.
- If you’re planting hops of the same variety, place the rhizomes about 3 feet apart. To separate different varieties, keep a 5-foot distance between them.
- Mulch around the base of the plants to help retain moisture and keep weeds at bay.
You can expect your hop plant to start growing within a few weeks. During the first year, it will have a shallow root system, so you’ll need to water the soil frequently (every day if possible) but lightly.
Caring for Hops: Training, Watering and Fertilizing
As your hop plant grows its bines (a type of vine), you’ll need to train it to climb. The best way to do this is by using a string or twine. Tie the string around the base of the plant and secure it to a strong support system, like a trellis, fence, or pole.
How to grow hops, so that they thrive? They’re thirsty plants, so make sure you water them regularly. They like a lot of water, but be careful not to overwater – the roots can rot if they sit in soggy soil. During hot weather, you may need to water your established hops every other day.
As your plant grows, it will need more nutrients. Fertilize it from late spring to early summer with a high-nitrogen fertilizer. How often you fertilize will depend on the type of fertilizer you use and the condition of your soil. Follow the directions on the package for best results.
Harvesting Hop Cones and Storing Them Safely
You can start harvesting hops as early as the second year after planting. The hop cone is ready to pick when it’s dry to the touch and brittle or papery, and smells slightly grassy. Test the maturity first by crushing a cone. Inside, you should be able to see a yellow and sticky lupulin gland.
Hops are typically harvested in late summer or early fall. To harvest, cut the hop bines about 18 inches below the cones. Then, carefully remove the cones from the bine and place them in a paper bag or basket. Avoid using a plastic container, as it can cause the hops to sweat and mold.
Once you’ve harvested your hops, they need to be dried before being stored. The best way to do this is by spreading them out on a screen or cheesecloth in a cool, dry place. A food dehydrator set on low heat can also be used.
It’s important to store hops in an airtight container, as they can quickly lose their flavor and aroma. If possible, keep them in the freezer – they’ll last for up to a year. At the end of the season, your hop plants will die back to their permanent rootstocks.
Enjoy Growing Your Own Hops – Happy Brewing!
Now that you know how to grow hops, it’s time to get started! With a little patience and care, you’ll be able to enjoy your very own homegrown hops and use them in your homebrews.


